Canalblog Tous les blogs Top blogs Mode, Art & Design Tous les blogs Mode, Art & Design
Suivre ce blog Administration + Créer mon blog
MENU
Parole de pâte
Publicité
9 avril 2008

perles à la pititefred

pour varier les plaisirs, une forme originale de perle

fred

pititefred

cette leçon en images est la propriété de son auteur, merci de respecter son travail et de ne pas en faire une copie sans son autorisation. This tutorial with images is an intellectual property of its author. Please, respect his/her work and do not copy / reproduce / translate it without his/her authorization. The journal staff  will be glad to provide you with an English translation, if needed.

Publicité
7 avril 2008

Challenge d'avril

"Montes moi ton bouton"

dés aujourd'hui et jusqu'au 4 mai, envoyez moi une photo , d'une création ,faite à partir de boutons en fimo.

Colliers, bracelet ,boucles d'oreille, ou objet déco, à vous de choisir !

la photo devra être inédite et ne pas (trop) dépasser les 200 Ko

Envoyer vos photos à cette adresse :

creaprovence@voila.fr

av_18

****

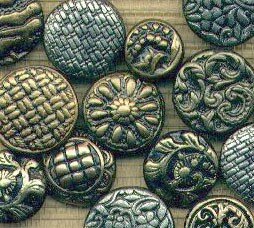
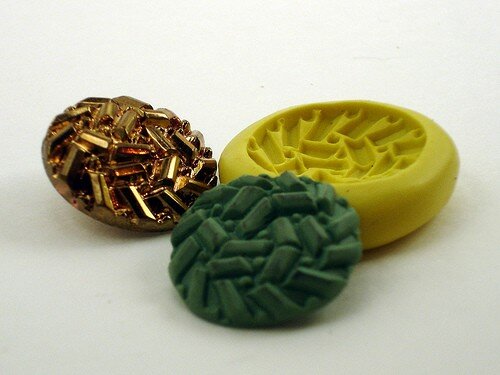
quelques liens et tutos pour réveiller vos envies ;-)

boutonun

boutondeux

boutontrois

boutonquatre

Image_2


boutoncinq

boutonsix


boutonsept


plein d'infos sur glassattic


boutonhuit


en français

5 avril 2008

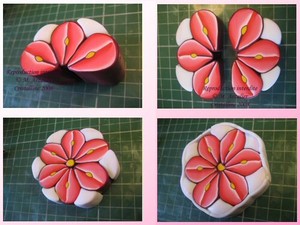
Encore des fleurs !

Hello !

Des fleurs, des fleurs et encore des fleurs ...
Et un tuto ;-)

cannes

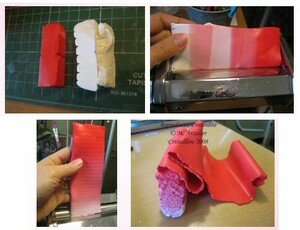
1- Avec une couleur et du blanc, réalisez une bande de dégradé. Pliez la bande affinée comme l‘indique la 4ème photo.

Image1

2 – Arrondissez les angles et coupez la canne de dégradé en deux. Affinez les pointes comme sur la 6ème photo.

Image2

3- Entourez un boudin jaune d’une plaque foncée pour faire les étamines (puis la réduire) et marquez leur emplacement dans les pétales avec un outil cylindrique.

Image3

4- Insérez l’étamine et ajoutez une fine plaque de la même teinte foncée pour en faire

la tige. Rassemblez

le tout et entourez à nouveau avec une plaque.

Image4

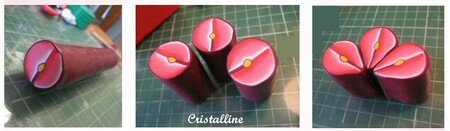
5- Réduire la « canne pétale » pour en faire un tube de

12 cm

. Coupez trois tronçons de

4 cm

et donnez leur la forme des pétales.

Image5

5- Ajoutez la couleur de fond entre chaque pétale puis coupez la demi fleur dans son épaisseur. Rapprochez les deux parties, ajoutez un fin boudin de couleur pour le cœur et finissez de compléter les creux entre deux pétales par la couleur choisie pour le fond (ici transparent). Réduire

Image6

A décliner dans toutes les couleurs, bien sûr ;-)
Je vous souhaite de bons moments de création !
Cristalline

essai_baniere_blog


cette leçon en images est la propriété de son auteur,
merci de respecter son travail et de ne pas en faire une copie sans son
autorisation.

This tutorial with images is an intellectual property of its author.
Please, respect his/her work and do not copy / reproduce / translate it without his/her authorization.
The journal staff  will be glad to provide you with an English translation, if needed.

4 avril 2008

merci de régler vos comptes personnels ailleurs

nous avons effacé deux commentaires sur une histoire de
"copiage"
merci de régler vos comptes personnels directement entre personnes
concernées
et pas sur le journal

3 avril 2008

Le hidden magic a encore frappé !

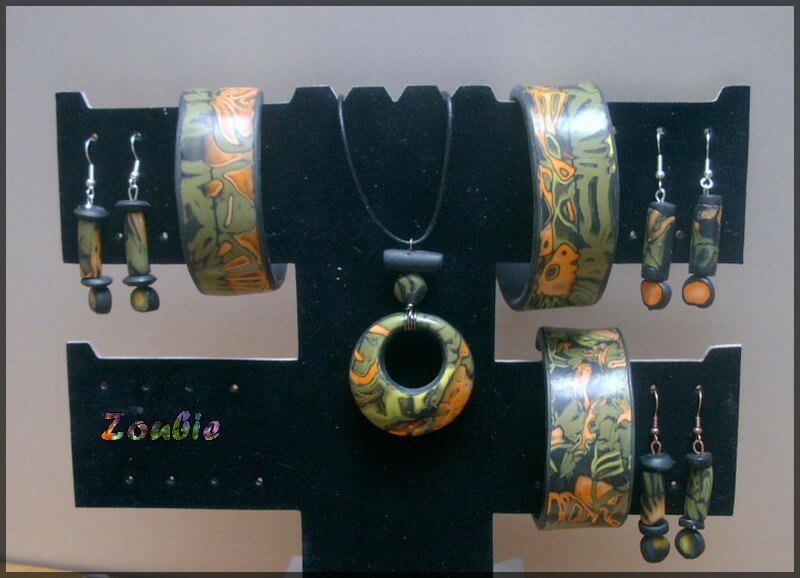
Cette semaine, c'est Véronique qui nous régale avec une nouvelle variation en hidden magic : il fallait oser ces couleurs un peu "camouflage" pour cette collection originale et très réussie qui a bien mérité nos suffrages.


bracelets_hiddenmagic

Image_1

Quant à Nadège, elle nous apporte tout simplement le printemps, avec ce collier poétiquement nommé "des fleurs et des lunes" !

Bravo Nadège, on l'a échappé belle : à trois jours près c'était la  lune rousse ;-))

desfleursetdeslunes


Qu'Anne et Olga se rassurent, je n'ai rien contre les rousses, bien au contraire : ce que je voulais dire, c'est que simplement avec la la lune rousse, il risque de geler un peu et alors bon, les fleurs dans ce cas-là, c'est pas gagné...

Admirez au passage une façon originale d'utiliser ses boutons !

Enfin bref, encore un joli choix cette semaine, et croyez moi ce n'est pas facile, vu toutes les merveilles que l'on voit passer !


Publicité
2 avril 2008

Two for the price of one...............

pendtrois
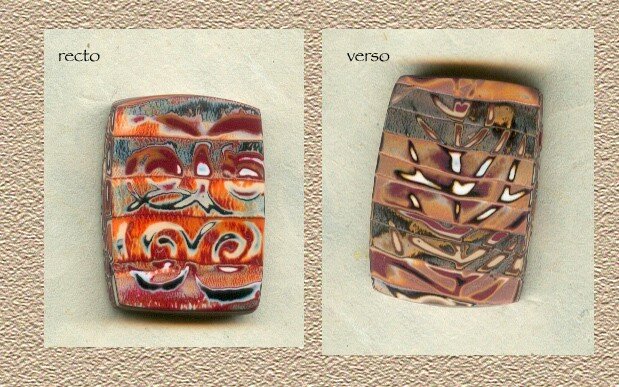
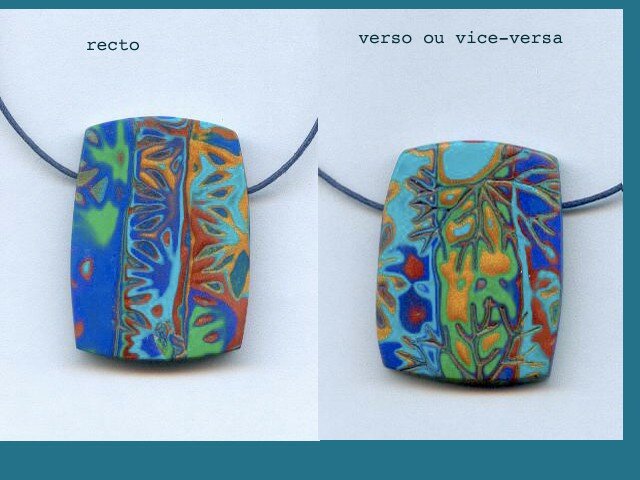
It is a fast and easy technique, with which you can create pendants and plates which present a design on both faces (recto and verso), and on which sides are nice enough and do not need to be hidden.
Materials needed: polymer clays (the colours you prefer), clay gun, blade, brayer, several different stamps, textures made with molding mats or home made (and which make very strong marks on the clay)
etapeun
first step: prepare some slices of clay with the chosen colours and stack them as for a mosaic cane.
The same technique here
(I make irregular slices in order to have lots of colours after the carving)
take an extruder disc quite large if you want to make a pendant
_tapedeux

second step: you put the log of clay inside the clay gun. Note that the last colour will be the ground colour. Extrude it.
You get a fair long log of clay which you will cut in regular chunks, following the dimension of the object you want to create, here a pendant with six chunks overlaid three by three

etapetrois
third step: cut the log of clay into six or eight chunks, adjusting the colours as you like


etape_quatre

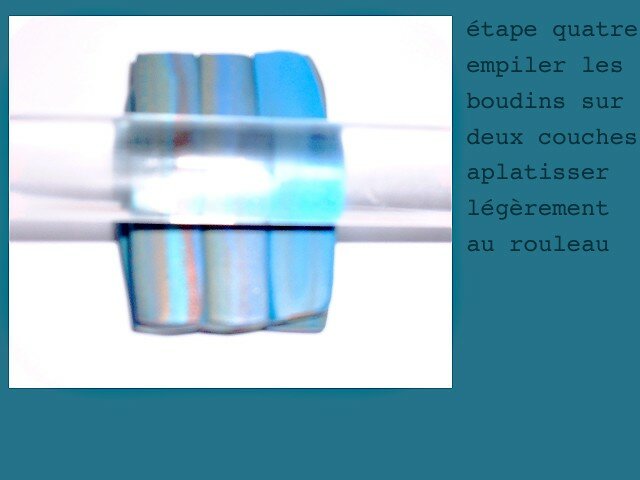
fourth step: overlay the chunks in two layers which you will slightly flatten with a brayer
At this stage, you can put a toothpick (or similar) between the two layers, in order to assemble the pendant and pass on the thread
etapecinq

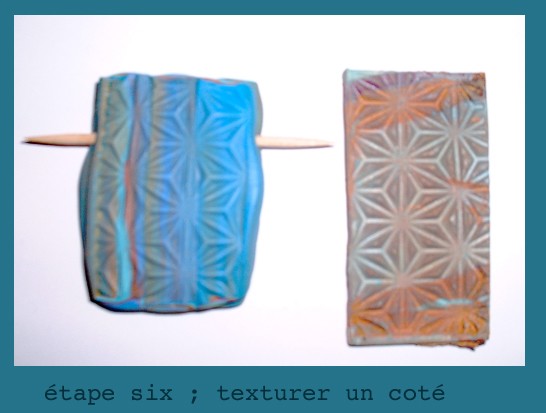
fifth step: choose two textures, one for the recto the other for the verso
sorry, there is a fault on the picture, you read verso, not “verson” (-:
My favourite texture is the left bottom one!!
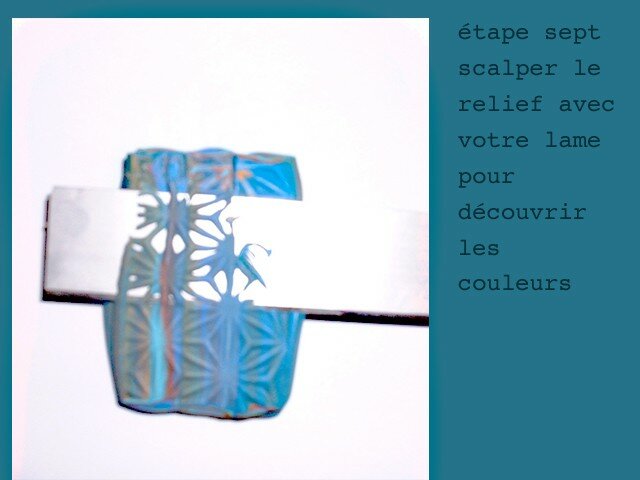
Gently carve out the embossments of the texture with a blade (you can use the scrap and put them on a single colour plate). It is better to wait for at least half an hour for the clay to harden before carving it out.
You make the same on the verso and you even out the sides of the pendant.
etapesix

etapesept

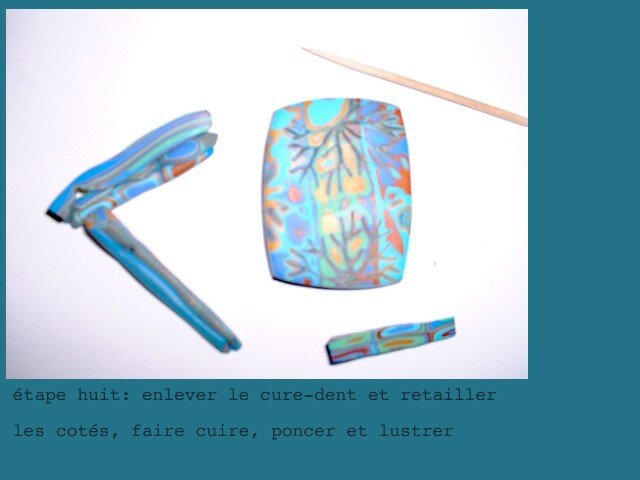
Eighth step : take off the toothpick and cut the sides. Bake it in the oven, sandpaper and polish the piece.

etape_huit


etapeneuf

Variations are countless, you can make plates on a single layer, for example to make earrings.

bouclesa

You need to calcolate accurately when you make le log of clay in order toh ave a very similar result for both earrings.
The advantages of this method is first of all its quickness. Moreover, the sides are decorative and there’s no need to hide them with a stripe of clay (and this I’ve never been very good at...)
This method is cited also in glassattic  here  (squashed canes) and on polymerclay daily here
Domi

translated by Maria

This tutorial with images is an intellectual property of its author.
Please, respect his/her work and do not copy / reproduce / translate it without his/her authorization.

2 avril 2008

let’s forget plastics!

tutoceramiqueun

Ceramics effect
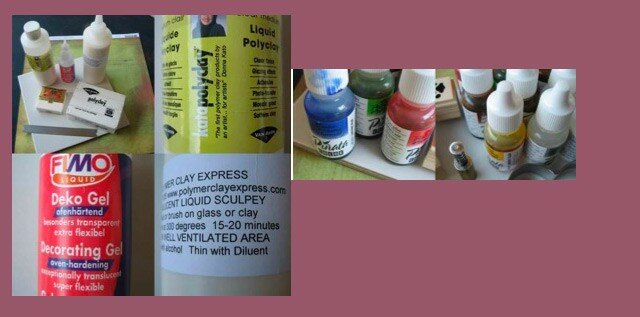
Materials
liquid Kato clay
liquid Fimo clay
Sculpey TLS
white Fimo classic
white Kato Clay
+ customary materials such as: cutting blades, toothpicks etc…
Pinata inks, or Sennelier, Pébéo…
clay gun
Liquid Kato Clay is more transparent than the other two brands. I made some tests with all of them and the winner is Kato. Nonetheless, it is possible to practice this tutorial with the other two, too.
tutoceramiquedeux


first step
First of all, you need to select the colours you are working with. Pour some liquid clay into a little bowl or similar...
Put one or two drops of ink on the liquid clay and let the alcohol evaporate before mixing the colour with a sharp-pointed stick or a tooth pick.
The evaporation step is not compulsory: you’re going to get an interesting effect of bubbles into the liquid clay if you do not mix it.
Here I do not mix it completely, in order to obtain a blending effect. Leave it aside.
tutoceramiquetrois

second step
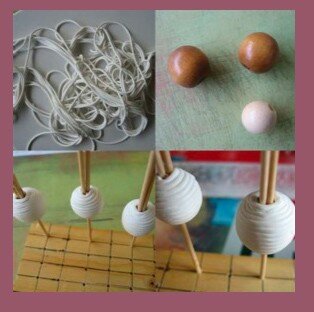
With your clay gun make some spaghettis with the white clay, which you’re going to roll around some core beads, here I use wooden beads.
You can also choose clay beads of course.
Put the beads on toothpicks.
tutoceramique


You take again the colour you have prepared. Apply the mix of ink and liquid clay onto the beads, in order to cover all of them.
Take care of draining out, do not put too much of it. The liquid clay will fix in the pods and will fix the colour pigments.
tutoceramiquequatre

Place your beads on a structure suitable to your oven. Let them harden in a pre-heated oven for 20 minutes at 120 degrees.

tutoceramiquecinq

o not sandpaper the beads, a matte finish is suitable. If you use wooden beads, do not put them in iced water otherwise the clay will break up. On the contrary, if your core beads is made of clay, you can throw them in iced water right away. For this tutorial I used wooden beads, thus no water.
Just a tip for wooden beads: they’re raw, so pass them in the oven for 30 minutes at 160° in order to dry the moisture: they will give forth a strong wooden  smell, it’s normal cause they are moist. You will have to air out the room.
Apply a first layer of varnish, really thin, let it dry for half an hour and repeat the operation with a thicker layer. For a remarkable effect, you can wait 24 hours and then apply again a layer of varnish.

This principle can apply to any kind of shapes, always working with white and liquid clay. The principle is that the beads go into the oven only one time.
by FATI -lempicka
to discover her creations just go ici

two more ways of imitating ceramics
in English (click on the images)
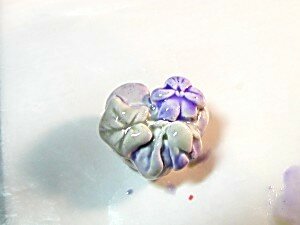
fig8

ceramic13

translated by Maria

This tutorial with images is an intellectual property of its author.
Please, respect his/her work and do not copy / reproduce / translate it without his/her authorization.

Publicité
<< < 1 2
Publicité
Newsletter
Publicité
Visiteurs
Depuis la création 8 925 404
Publicité