Canalblog
Suivre ce blog Administration + Créer mon blog
Publicité
Parole de pâte
25 juin 2008

it seems water but it's oil....

en français ici

Bounette gets wonderful translucent effects by using the translucent clay with oil-based paints

bounette

she has willingly disclosed to us her secrets

bounette1

bounette2

Condition the translucent clay

Add some little spots of your chosen oil-based paint

bounette3

Bend in two the clay and close it completely

bounette4

Slightly build the paint into the clay, but try not to mix it too much

bounette5

pass the clay into the pasta machine

bounette6

You will obtain a sheet of clay with some shades of  colour

cut into the sheet of coloured clay some discs with a round shape cutter

bounette7

Create some beads in the shapes you like

bounette8


12059327_p

11658230_p

You can admire her creations here


my little experiments with the Bounette method,
with some watercolour mosaic and some mokume gané, the depth effects are amazing

domi

essaibounette

wchuile

Translated by Maria: chiocciolazzurra@yahoo.it

This tutorial with images is an intellectual property of its author.
Please, respect his/her work and do not copy / reproduce / translate it without his/her authorization.

Publicité
Publicité
16 juin 2008

Tutorial cane “lily from the garden”

titre

en français ici

Hello everybody!


Here it is a little step-by-step for the season, to realize a flower growing in our gardens in this period: the lily flower. Soon on my blog the printable version and the pearls realized with this cane.

degrade

First, make a skinner blend from light green to white, passing by beige. The pasta machine thickness is n.1.


Cut the skinner blend into two: one piece will be the central axis of the petal. Pass the other half in the pasta machine thickness n. 3, and then cut in two parts.


Then you cut this second half into strips of the same size but different in colour and thickness. Stack all in a symmetric way.

petales

Balance the edges and bend the two extremities, adding two small colour logs (here beige on the upper side, pale green the bottom side)


Reduce the cane: here you have some nice striped petals. Put around this striped log a thin sheet of dark green.

etamines

Make a marble log recovered with thin black clay.


Superpose to it a sheet of pale green (T1) between two sheets of dark green (T6) to model the stems of the stamen and of the pistil.

pistil


Make a log of pale green recovered by dark green. Make a groove within it with a plastic card (as a Visa) and join the stem. Recover it with a light colour (as beige).

assembler

Cut 6 petals of the same size, cut one of tem in the middle as the step before, in order to insert a brown log (the head of the stamen) and the pistil.


Make two dents in the two lateral petals, in order to insert two stamens. Compose the definitive flower filling the centre with some green clay (better if a skinner blend). Try to give a nice shape to the petals.

reduction

Make a stripe quite thin (T6) with some white clay and out it around the flower. Start with filling the space between two petals with a small triangle log of translucid clay, then continue with  bigger logs.


Reduce the cane in several sizes and think about preserve the ends which are wasted: they can be of great use to compose an interesting base for a cane.

cane_lys

Rotation_de_IMG_6201

Think about diversify the colours : all is possible !


It’s your turn to play!


Have a nice time in creating!

Copie_de_mini_baniere_sof1


Translated by Maria: chiocciolazzurra@yahoo.it

This tutorial with images is an intellectual property of its author.
Please, respect his/her work and do not copy / reproduce / translate it without his/her authorization.

2 avril 2008

Two for the price of one...............

pendtrois
It is a fast and easy technique, with which you can create pendants and plates which present a design on both faces (recto and verso), and on which sides are nice enough and do not need to be hidden.
Materials needed: polymer clays (the colours you prefer), clay gun, blade, brayer, several different stamps, textures made with molding mats or home made (and which make very strong marks on the clay)
etapeun
first step: prepare some slices of clay with the chosen colours and stack them as for a mosaic cane.
The same technique here
(I make irregular slices in order to have lots of colours after the carving)
take an extruder disc quite large if you want to make a pendant
_tapedeux

second step: you put the log of clay inside the clay gun. Note that the last colour will be the ground colour. Extrude it.
You get a fair long log of clay which you will cut in regular chunks, following the dimension of the object you want to create, here a pendant with six chunks overlaid three by three

etapetrois
third step: cut the log of clay into six or eight chunks, adjusting the colours as you like


etape_quatre

fourth step: overlay the chunks in two layers which you will slightly flatten with a brayer
At this stage, you can put a toothpick (or similar) between the two layers, in order to assemble the pendant and pass on the thread
etapecinq

fifth step: choose two textures, one for the recto the other for the verso
sorry, there is a fault on the picture, you read verso, not “verson” (-:
My favourite texture is the left bottom one!!
Gently carve out the embossments of the texture with a blade (you can use the scrap and put them on a single colour plate). It is better to wait for at least half an hour for the clay to harden before carving it out.
You make the same on the verso and you even out the sides of the pendant.
etapesix

etapesept

Eighth step : take off the toothpick and cut the sides. Bake it in the oven, sandpaper and polish the piece.

etape_huit


etapeneuf

Variations are countless, you can make plates on a single layer, for example to make earrings.

bouclesa

You need to calcolate accurately when you make le log of clay in order toh ave a very similar result for both earrings.
The advantages of this method is first of all its quickness. Moreover, the sides are decorative and there’s no need to hide them with a stripe of clay (and this I’ve never been very good at...)
This method is cited also in glassattic  here  (squashed canes) and on polymerclay daily here
Domi

translated by Maria

This tutorial with images is an intellectual property of its author.
Please, respect his/her work and do not copy / reproduce / translate it without his/her authorization.

2 avril 2008

let’s forget plastics!

tutoceramiqueun

Ceramics effect
Materials
liquid Kato clay
liquid Fimo clay
Sculpey TLS
white Fimo classic
white Kato Clay
+ customary materials such as: cutting blades, toothpicks etc…
Pinata inks, or Sennelier, Pébéo…
clay gun
Liquid Kato Clay is more transparent than the other two brands. I made some tests with all of them and the winner is Kato. Nonetheless, it is possible to practice this tutorial with the other two, too.

tutoceramiquedeux


first step
First of all, you need to select the colours you are working with. Pour some liquid clay into a little bowl or similar...
Put one or two drops of ink on the liquid clay and let the alcohol evaporate before mixing the colour with a sharp-pointed stick or a tooth pick.
The evaporation step is not compulsory: you’re going to get an interesting effect of bubbles into the liquid clay if you do not mix it.
Here I do not mix it completely, in order to obtain a blending effect. Leave it aside.
tutoceramiquetrois

second step
With your clay gun make some spaghettis with the white clay, which you’re going to roll around some core beads, here I use wooden beads.
You can also choose clay beads of course.
Put the beads on toothpicks.
tutoceramique


You take again the colour you have prepared. Apply the mix of ink and liquid clay onto the beads, in order to cover all of them.
Take care of draining out, do not put too much of it. The liquid clay will fix in the pods and will fix the colour pigments.
tutoceramiquequatre

Place your beads on a structure suitable to your oven. Let them harden in a pre-heated oven for 20 minutes at 120 degrees.

tutoceramiquecinq

o not sandpaper the beads, a matte finish is suitable. If you use wooden beads, do not put them in iced water otherwise the clay will break up. On the contrary, if your core beads is made of clay, you can throw them in iced water right away. For this tutorial I used wooden beads, thus no water.
Just a tip for wooden beads: they’re raw, so pass them in the oven for 30 minutes at 160° in order to dry the moisture: they will give forth a strong wooden  smell, it’s normal cause they are moist. You will have to air out the room.
Apply a first layer of varnish, really thin, let it dry for half an hour and repeat the operation with a thicker layer. For a remarkable effect, you can wait 24 hours and then apply again a layer of varnish.

This principle can apply to any kind of shapes, always working with white and liquid clay. The principle is that the beads go into the oven only one time.
by FATI -lempicka
to discover her creations just go ici

two more ways of imitating ceramics
in English (click on the images)

fig8

ceramic13

translated by Maria

This tutorial with images is an intellectual property of its author.
Please, respect his/her work and do not copy / reproduce / translate it without his/her authorization.

5 février 2008

vio's secret - translation

Image_1

This project is presented with enough details to enable beginners to try it. I will take you by the hand and guide you along with pictures of each of the steps.

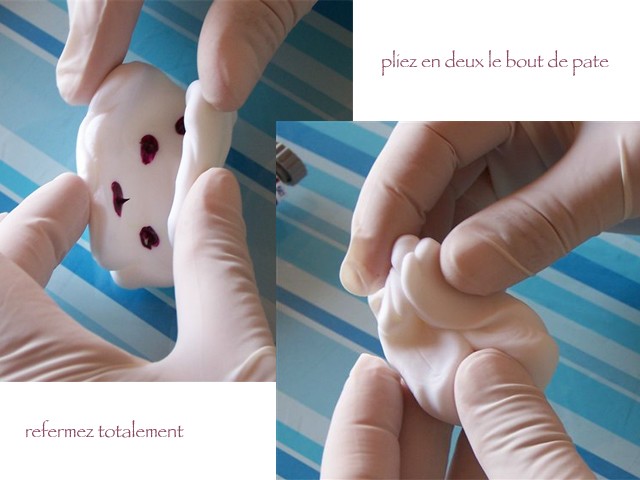
First of all, chose two colours of clay: I took contrasting colours to illustrate this project.

Image_1

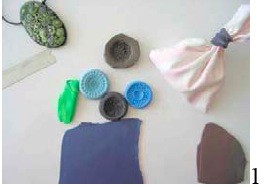
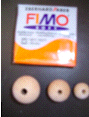
Fig 1: You will need different moulds (made with buttons for this project), a mould release (cornstarch), a base sheet of clay (rolled on #3, metallic blue), a contrasting colour (green) and another sheet of clay (I use my leftovers for this).

Image_1

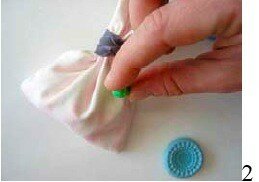
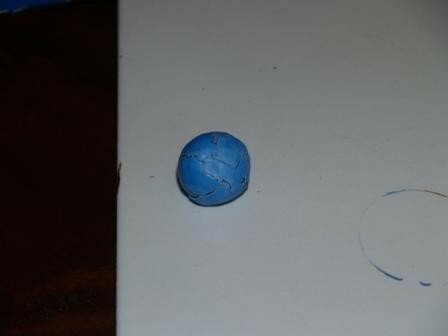
Fig 2: Make a ball with a small amount of green clay, which will be used for the texture.  Put some cornstarch on it.

Image_1
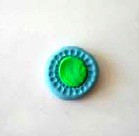
Fig 3: Press the ball of green clay (with mould release on it) into the mould; no need to fill the mould exactly, all you need to do is pick up some texture.

Image_1
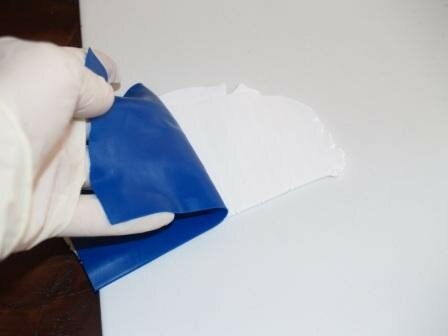
Fig4 : Important : take the mould with the green clay still in it and unmould it by pressing it onto the sheet of scrap clay. This sheet should be well fixed on your work surface.

Image_2


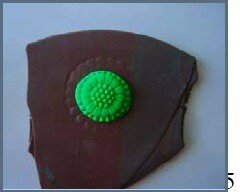
Fig 5: The green clay will stick to the sheet of scrap clay. This step is important because you will want to make a delicate cut from the texture. 

Image_1

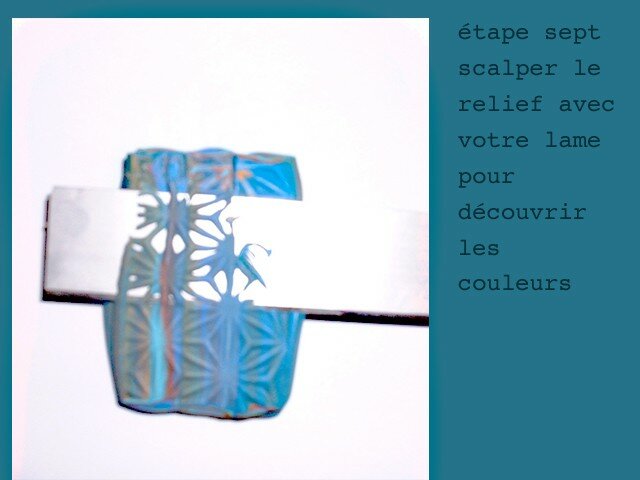
Fig 6: Take the blade as illustrated and cut a very thin part of the textured ball; no need to take the whole texture we just want the top part of it. This is important for interesting results.

Image_1
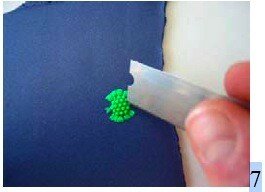
Fig 7: Take the thin slice put it on a piece of card stock and using the corner of your blade, pick it up and place it where you want on the base sheet of blue clay.

Image_1

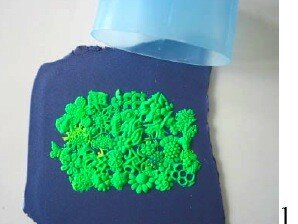
Fig 8: Repeat the same process with other moulds (I’ve done this with only one or two mould and got great results…experiment). Using the corner of your blade you can control exactly where you want to place the paper-thin textures. For best results, it is better to overlap the textures slightly.

Fig 9:  Make a textured surface large enough to accommodate the project you want to do. This surface will be used for the pendant that I will show you. 

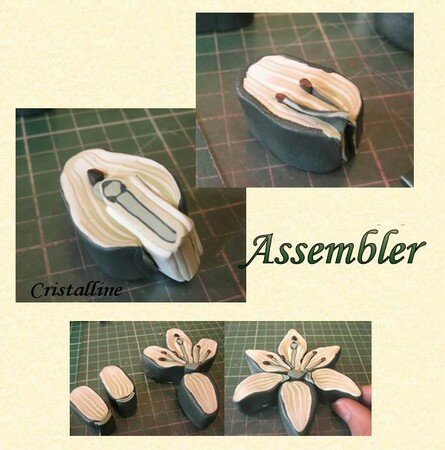
For the second part, I will show you how to assemble the pendant. You can make other pendants in this manner: this is only one way to do it.
We are resuming where we left off at the end of the first lesson.

Image_1

Fig 1: Make your textured surface large enough to accept the project you have in mind. Here I use the cover of my anti-perspirant (my Secret he he!). I use it to cut out and also to give my pendant a rounded shape; it passed the oven test many times. You can also use light bulbs for round pendants or stones for original shapes.  Find your own way: satisfaction guaranteed!!

Image_1

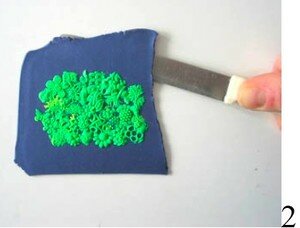
Fig 2: With a non-serrated knife, loosen your blue sheet from the work surface.

Image_1

Fig 3: Cut out the oval shape, using the lid.

Image_1

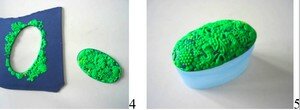
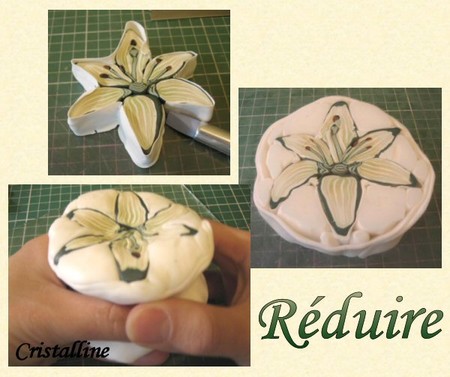
Figs 4-5: Place the cut out oval on the rounded cover. Using the palm of the hand, gently press down to make sure the little textures are well adhered to the base sheet and also to give your oval a rounded shape. Bake 30 minutes at prescribed temperatures. 

Image_1

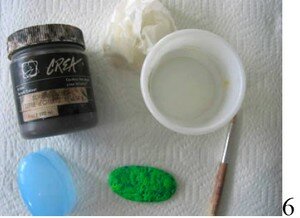
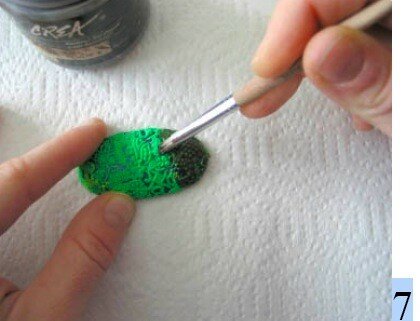
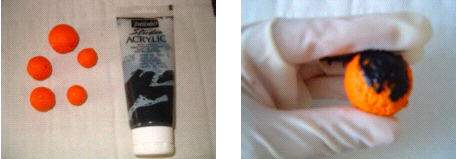
Fig 6: One part of the pendant is now baked. Acrylic paints are used to make the textures pop out. This process can be applied to many other projects. You will need an old stiff paint brush, a bit of water a paper towel (or rag) and of course, paint. I used burnt umber for this project.

Image_1

Fig 7:  Apply a thin layer of paint on a small area.

Image_1

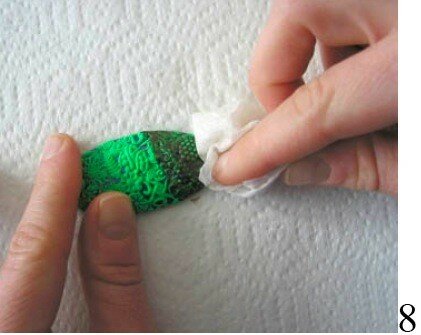
Fig 8:  I said a small area because acrylic paints dry fast and you want to control the process as much as possible. You cover a small area at a time and wipe off the surplus as quickly as possible. Your towel can be humid but barely. Just a little or else you will rub all the paint off.  The paint should remain in the nooks and crannies!!

Image_1

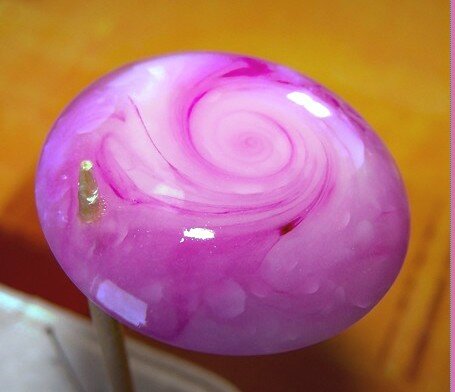
Fig 9: the result…. but we are not done yet!

Image_1

Fig 10:  Take the small oval and sand it with rough sandpaper. Do this under water to avoid breathing in the particles that aren’t all that good for your lungs. For illustration purposes, I didn’t do it under water: do what I say, don’t do what I do!

Image_1

IFig 11: Why this sanding now? It is to even out, enlarge and roughen the surface to be glued.

Image_1

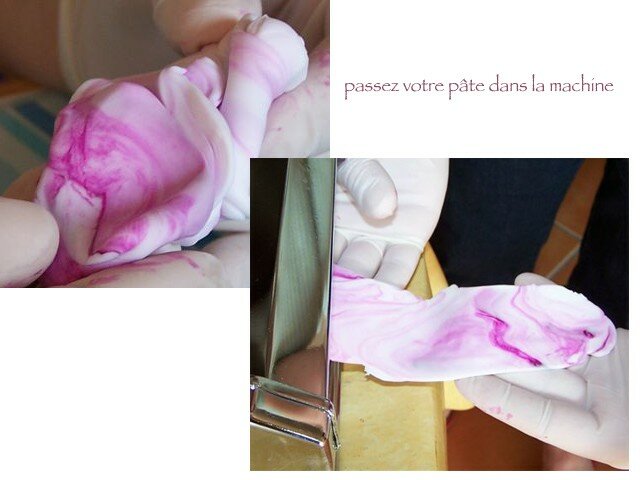
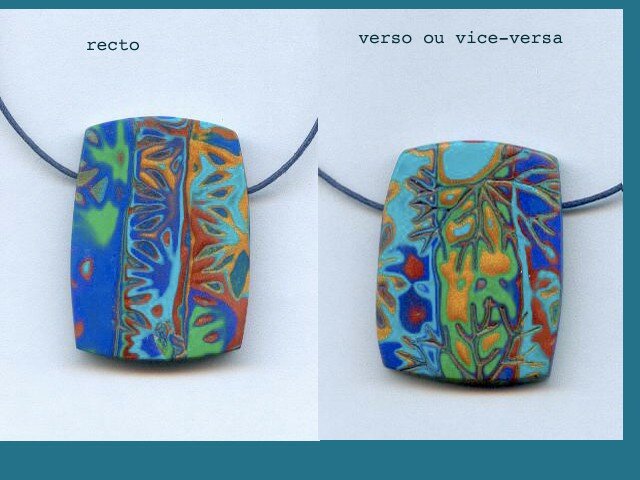
Fig 12: Run another sheet of clay through the pasta machine (#3); I used a blue sheet to match the base sheet of my pendant. Give it a texture if you wish. This will be the back of your pendant. Always remember the backs of your pieces should be interesting and well finished. Roll another sheet of clay (it can be scrap clay or whatever) through the pasta machine at #3 or at the thickness of the cord you want to use.   


Image_1
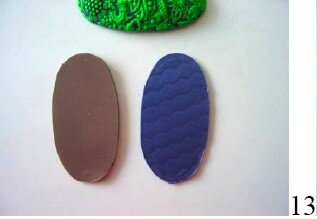
Fig 13: Cut out two oval shapes using your baked textured oval as a template.

Image_1

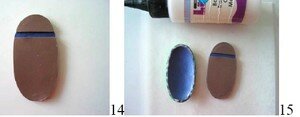
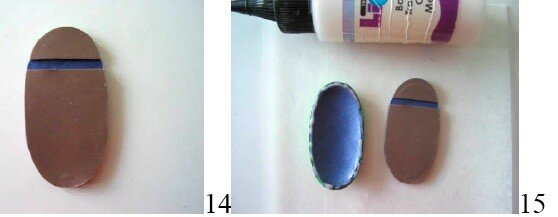
Fig 14: Place the textured side of the blue unbaked oval shape towards your work surface and place the other oval sheet on top of the blue sheet. Cut out a strip for your cord. Press together.

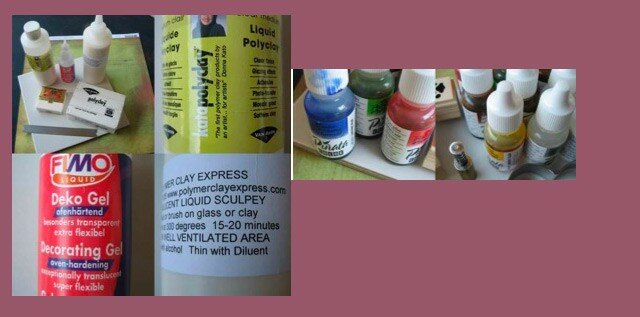
Fig 15: Apply liquid clay to the sanded surface of your textured and baked oval (the green one).

Image_1
Fig 16 : Place the baked oval onto the two other sheets and make the joint as tight as possible. Bake once again for 30 minutes at the prescribed temperature.

Image_2

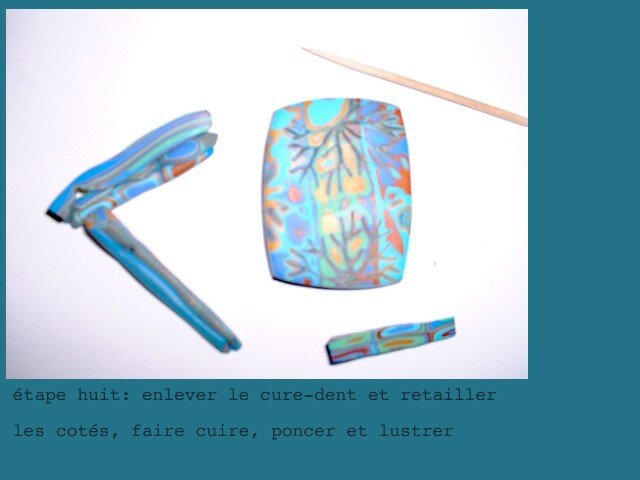
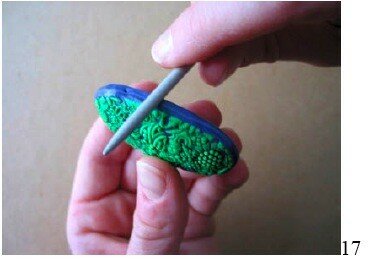
Fig 17:  Sand the sides to make them even.
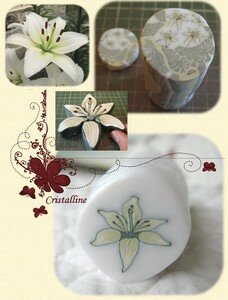
Then, cut out a thin strip of clay (#6) and place that strip around the pendant to hide the different layers. Make all joints even with a knitting needle or whatever you use. Find and pierce the holes and rebake once again.
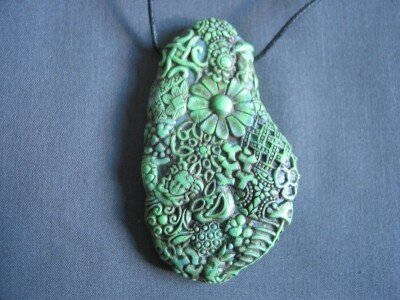
And coui coui coui my story is finie!!!! Take it from there….


Copyright Violette Laporte 2005

75110261


This tutorial with images is an intellectual property of its author.
Please, respect his/her work and do not copy / reproduce / translate it without his/her authorization.

Publicité
Publicité
29 janvier 2007

Watercolor mosaic technique from Maggie Maggio

XaI was delighted when Maggie Maggio  enthusiastically authorized us to publish a tutorial on her famous watercolor mosaic technique which polymer clay artist enjoy so much.

Firts, Maggie gave me her basic technique.

It is just the thinnest possible color washed over white. the black is added to give depth to the collage.

Basic technique for a solid color wash:

1/sheet a small amount of clay at the thinnest manageable setting of your pasta machine.

2/ Sheet some white at the thickest setting on your PM

P1184885

3/ Put the color on top of the white. Sheet at the middle setting.

P1184886

P1184888

4/ Sheet black at the midde setting and add it under the white. Sheet at thinnest manageable setting.

On the second piture below, the original color is the blue clay on the left. The left sheet has been done at 6 on my PM, the middle one at 7 and the right one at 8. Be careful to keep control of your sheet while using the thinnest setting of your PM (which I obviously didn't at 7 and 8 !!!)

P1184889

P1184890

5/ tear small pieces and collage.

P1184892

P1184897

Note: If you want to sand the surface of the finished piece, add a very thin layer of translucent clay on top of the color at the same time you add the black under the white.

This will make it hard to see the color underneath until after you bake it and it usually "yellows" the color a little so I don't like to do it. Better not to sand! Wearing gloves is a good idea.

You can vary the appearance of the top sheet clay by using whatever technique you like.

Below, I have used a skinner blend top sheet, from dark to light blue.

P1184900

On the left below, beads with the skinner blend top sheet. On the right, the top sheet is a solid color (the watercolor effect is even more noticeable).

P1184901

P1184909

But you can use any technique for your top sheet like marbleizing colors together, using inclusions, using scraps of canes or by getting creative with the whatever echnique you like.

Basically, play with it and have fun.

You can enjoy Maggie's magnificent work on her site : http://www.maggiemaggio.com/color/


Maggie will be teaching in France from August 6 to August 10 in a renovated farm near Verneuil sur Abre in Normandy.

Il will be a smashing color workshop for both polymer and fiber artists.

It will include the watercolor mosaic technique as part of the class as well as exploring ways to create a personal palette and make gorgeous color combinations.

For more information, you can contact "Bel esprit creative".

Many many thanks to Maggie for sharing her technique with us.

Florence Jakarta

18 novembre 2006

It crakles.....

or how to use your old canes, old clay.
Born by accident,
this technique is very easy.

craqperlesdeux

material
clay gun, the new or the old model.
( however the new one may be a little fragile for this technique, mine got jammed!)
Old/Dry polymer clay (the king that crumbles when not conditioned and warmed up),
normal soft clay
and  imagination,

Step one
make rough logs alternating different qualities of clay (dry and soft)

Put your log in the clay gun.

you can out your log in two and reverse one from the other for more contrast
craqun

Step two : extrude strongly !
craqdeux

Depending on the disc you use and also on the dryness of your clay, you will get different effects.
Here, I used an average size log disc.

Step three : Coil

craqenroule

coil your logs around a ball of scrap clay
at this stage, either you carefully smooth and polish your bead
or you just smooth very lightly only to keep the relief

craqperles

beads with relief

7540215_p

smoothed and polished beads

7540262_p

Have fun.

Tip : if your clay is not dry enough, roll your soft clay in the pasta machine and let it rest overnight between 2 sheets of paper with a weight on it such as a catalogue or so.

The paper will absorbe the oil and dry the clay.

You can also directly put your old canes into the clay gun.

surprise guaranteed.

dominique
translated by florence jakarta

30 août 2006

LAVA STONES


Here is a tutorial to create « light » lava stones and give them your personal touch.

Image_17


Supplies :


3 big wooden beads (diameter 25mm). See the trick here: “dry wood : your guaranty of success”


4 medium wooden beads (20mm)


12 to 16 small wooden beads (15mm)


1 fimo soft block (color of your choice)


Pasta machine


Coarse salt


Acrylic paint –any color)


Gloves


Dremel


Polishing tool


Image_13


Roll your clay through the pasta machine (setting nb3).


Cut a strip the size of your wooden bead and cover it.


Repeat for all your wooden beads.


Be careful not to entrap air in the process.


Then put your beads in a container full of coarse salt. Do not press too hard, just enough for the salt to get embedded in the beads.

Image_14


Bake for 30mn at 150.


Let them cool, then place them under water (for the salt to melt).


Be cautious and do not let them stay too long in the water as the wood might dilate and therefore break the beads.

At this stage, your beads are already ready for use. But you can go on and give them a personal touch.

Put on your gloves. Roll one of your bead in a bit of acrylic paint (a nut size) until it is totally covered with paint.

Image_15


Let them dry. Then sand your beads so that the original color comes out again but the paint remains in the holes created by the salt.

Image_16


Your beads are now ready.


Image_18

27 juin 2006

The road to amber

version en anglais de la route de l'ambre traduction par FLO
pour nos lecteurs anglophones

Different roads will get you there.

ambre


First, get your materials: translucent clay, (fimo and premo), brown and yellow piñata inks, brown wax, blade, gloves, sandpaper (800 to 2000), sanding machine (will make your life easier for polishing.

ambreetapeun 

First road:

Form your beads with translucent clay, do not add anything to it. You can mix different brands; the effect will be nicer because the different brand go brown differently while baking.  

Second road:

Form your bead, cut it slightly in different spots and insert drops of piñata inks. Form your bead again and smooth it. (You have to wear gloves here!).  

Third road:

Grate a little brown wax and mix it with your translucent clay (it could be the kind of wax pastel), form the bead and smooth.  

Bake your beads at 130°(266°fahrenheit) for 15 minutes then increase at 150° (302°), then 160° (320°)

until 180 °.(356° )

Turn them over after 5 minutes.

Watch carefully while they get brown (I actually pushed it until 200° (392°) but the bead got a bit too dark on one side!). In fact, everything depends on your oven, the clay you used; you need to make your own experience until you have the color you want.

The process is in fact very similar to making caramel!
ambrecuisson


Immediately after baking, plunge your beads in very cold water. This will reinforce the plaquing effect which is interesting for amber.

And then the entire secret remains in the sanding!!! You will need the miracle product to reveal the transparency: your elbow!!!

You will start with a 800 or 1000 sand paper and you will go up to 1200-1500-2000 if you can find some.  


To sand properly, there is no need to do it strongly, on the contrary. You have to take water with soap, soak your sand paper in advance and then “caress” your bead, rinse, caress it again, rinse, etc…..At the end of the sanding process, your beads are ugly, dull, this is normal. Dry them and then, (this is the revelation!) polish them.


Now you have smooth and glossy amber beads.
ambrelustrage


This tutorial with images is an intellectual property of its author.
Please, respect his/her work and do not copy / reproduce / translate it without his/her authorization.

24 avril 2006

"un petit tour en gondole "-english version

les perles vénitiennes par Nell

titregenerique

Supplies :
4 small cups
Toothpicks
Support for the painting and baking stage
Embossing powder or varnish
Gloves
Translucent clay
A pinch of pink clay (red + white)
A pinch of beige clay ( brown+ white+ yellow)
A pinch of white
One gold leaf
Liquid clay
Pearlex : green + bright pink + yellow+ white
melange
With the colored clays, make three logs and twist them together. Fold it and twist again.
Add the translucent clay. Be careful not to blend too much the colors together.
Add small pieces of the golden leaf anywhere you want on the log.
Prepare your pearls with gloves. Be aware there will be no sanding so you do not want to see your fingerprints!
Drill the hole, bake 15 mn, let cool.
In small cups, blend each pearlex with liquid clay. Use a toothpick for that. The liquid clay has to become thick in order not to run.
Put your pearl between two supports so that it does not move anymore (you may use cooking foil to help steady the pearls).
You will work on the four sides successively.

1st side: dip the toothpick in the yellow liquid clay and paint a square in the middle of the peal and little triangles near the hole.
In the square, drop a pink circle.
On the pink circle, drop an even smaller white circle.
That’s right, you have made a rose!
Draw the leaves with 4 little green drops around the rose.

rose3

Let the pearl lay flat (otherwise it runs) and bake for 10 minutes. Let it coll.
Repeat for the three other sides.
When it is done, varnish.
You may also use embossing powder to make your pearls even glossier.

perlemod_le

I you need any explanation, do not hesitate to contact me.

translation by Florence Jakarta

This tutorial with images is an intellectual property of its author. Please, respect his/her work and do not copy / reproduce / translate it without his/her authorization.

Publicité
Publicité
<< < 1 2 3 4 > >>
Publicité
Newsletter
Visiteurs
Depuis la création 8 904 436
Publicité