Kaleidoscope cane with a base of four facets
The kaleidoscope is a XIX century invention (look at the WIKI page about it) which consists in multiplying an image by a number of facets in mirrors. This device was most known by its playing side and by its beauty. Adapting it to the polymer clay means to multiply a cane by cutting it into pieces and join them into mirrors, playing with the optical effect obtained by the multiplication of the pattern into a unique cane. Polymer clay artists make wonders with this basic idea, wonderful patterns each with its unique style. I love this idea and I try a pattern with a base of four, as you can see here an execution in a ring.
I start easily with a base of four, but I choose to use a cane quite "hallucinogenic" with some skinner blends in order to stress the optical effect: this idea came from the flower cane of the previous article. I used some fimo clay, a pasta machine, some blades and a ruler. The blends are made at setting nr. 1 and the coating of fimo gold at nr. 6.
Picture 1: the first blend is in the blue tones, I used 1/3 white (nr. 52) + 1/3 pastel blue (the new nr. 305) + 1/3 mint blue (nr. 49).
Picture 2: the second skinner blend is made at several times, from rose to yellow creating an orange tone (rose 22 + yellow 16), then some yellow to white for the end. Each blend is stretched to make an accordion, which is sensible on the blue side.
Picture 3: the skinner blends are wrapped in fimo gold.
Picture 4. the blended canes are stretched and extended taking care to keep the blue on one side and the wthite in the other in a flat shape.
picture 5: this long cane is passed at setting nr. 1 on the pasta machine and comes out as a ribbon. I cut each ribbon in the same length and in 6 equal parts (so I get 12 pieces with the two colours).
Picture 6: 5 of the 6 parts are needed to make the centre of the pattern, pressed together top-to-tail, the last pieces are used later.
Picture 7: the blue center of the pattern is delicately shaped with a point on the higher side and kept flat at the base.
picture 8: the pieces of rose/yellow ribbon are shaped with a beginning of spiral pattern on one side, as an inverted question mark. As for the top two, I added a very thin log of gold fimo in order to give some thickness, as I found the shape too flat, but this is not compulsory. Here I use 4 of the 6 slices of the yellow ribbon, leaving two more for later.
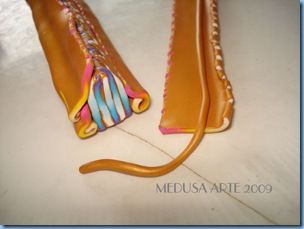
Picture 9: some like a striped face surrounded by ringlets, the pattern is done.
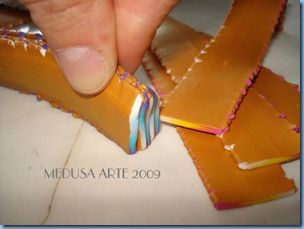
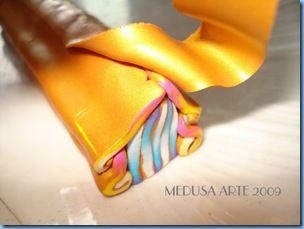
Picture 10: a layer of golden fimo very thin hides the irregularities on the top, as fpr the bottom.
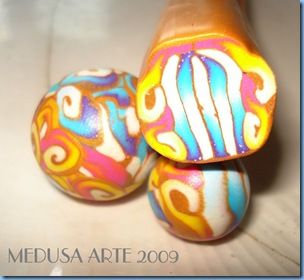
picture 11: the cane for the base pattern is ready, I use the left-over clay to make some try-beads.
picture 12: the cane is cut intoo 4 equal parts, after having shaped a point on the side which will form the center of the kaleidoscope.
picture 13: the two sclices of the yellow-rose ribbon and the leftover from the blue one will form the spiral pattern.
picture 14: this cane will be stretched and extended in a triangle to fit the empty spaces, so you need to have the same length as for the base cane and cut it into four as that one. The leftovers from this cane will suit to make some trials.

Picture 15: here are the results befors working out the whole cane.
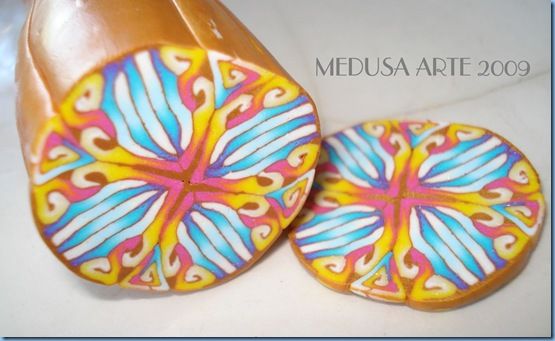
Picture 16: the kaleidoscope cane with a base of four done, pressed and cut gives as a result a repetitive pattern.
We could continue to cut the cane and assemble it again, as in a real kaleidoscope we add mirror facets. Maybe for another stage, as this was my very first one and I need it to make at least a hundred beads. I'm curious though of the results I could have obtained by cutting it into six... still a story of thickness of stripes! I hope you enjoyed this and it could give you inspiration for many creations, see you soon!
This tutorial with images is an intellectual property of its author.
Please, respect his/her work and do not copy / reproduce / translate it without his/her authorization.
Translated by Maria: chiocciolazzurra@yahoo.it







/http%3A%2F%2Fstorage.canalblog.com%2F61%2F88%2F52426%2F120273461_o.jpg)
/http%3A%2F%2Fveblog.canalblog.com%2Fimages%2Fgifoeuf.gif)
/http%3A%2F%2Fstorage.canalblog.com%2F54%2F80%2F52426%2F115598565.jpg)
/http%3A%2F%2Fstorage.canalblog.com%2F84%2F38%2F52426%2F115249638_o.jpg)