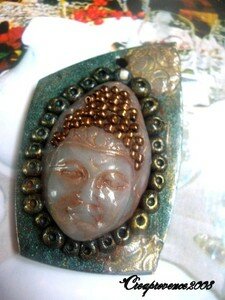
This project is presented with enough details to enable beginners to try it. I will take you by the hand and guide you along with pictures of each of the steps.
First of all, chose two colours of clay: I took contrasting colours to illustrate this project.

Fig 1: You will need different moulds (made with buttons for this project), a mould release (cornstarch), a base sheet of clay (rolled on #3, metallic blue), a contrasting colour (green) and another sheet of clay (I use my leftovers for this).

Fig 2: Make a ball with a small amount of green clay, which will be used for the texture. Put some cornstarch on it.

Fig 3: Press the ball of green clay (with mould release on it) into the mould; no need to fill the mould exactly, all you need to do is pick up some texture.
Fig4 : Important : take the mould with the green clay still in it and unmould it by pressing it onto the sheet of scrap clay. This sheet should be well fixed on your work surface.
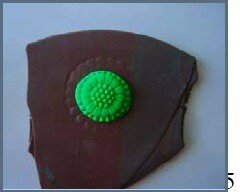
Fig 5: The green clay will stick to the sheet of scrap clay. This step is important because you will want to make a delicate cut from the texture.

Fig 6: Take the blade as illustrated and cut a very thin part of the textured ball; no need to take the whole texture we just want the top part of it. This is important for interesting results.
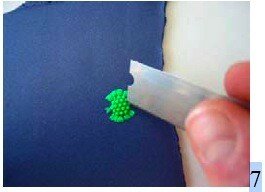
Fig 7: Take the thin slice put it on a piece of card stock and using the corner of your blade, pick it up and place it where you want on the base sheet of blue clay.

Fig 8: Repeat the same process with other moulds (I’ve done this with only one or two mould and got great results…experiment). Using the corner of your blade you can control exactly where you want to place the paper-thin textures. For best results, it is better to overlap the textures slightly.
Fig 9: Make a textured surface large enough to accommodate the project you want to do. This surface will be used for the pendant that I will show you.
For the second part, I will show you how to assemble the pendant. You can make other pendants in this manner: this is only one way to do it.
We are resuming where we left off at the end of the first lesson.

Fig 1: Make your textured surface large enough to accept the project you have in mind. Here I use the cover of my anti-perspirant (my Secret he he!). I use it to cut out and also to give my pendant a rounded shape; it passed the oven test many times. You can also use light bulbs for round pendants or stones for original shapes. Find your own way: satisfaction guaranteed!!
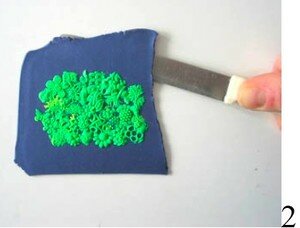
Fig 2: With a non-serrated knife, loosen your blue sheet from the work surface.

Fig 3: Cut out the oval shape, using the lid.
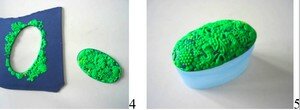
Figs 4-5: Place the cut out oval on the rounded cover. Using the palm of the hand, gently press down to make sure the little textures are well adhered to the base sheet and also to give your oval a rounded shape. Bake 30 minutes at prescribed temperatures.
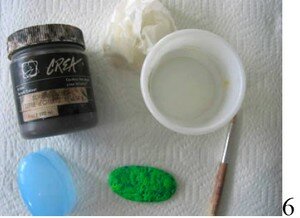
Fig 6: One part of the pendant is now baked. Acrylic paints are used to make the textures pop out. This process can be applied to many other projects. You will need an old stiff paint brush, a bit of water a paper towel (or rag) and of course, paint. I used burnt umber for this project.
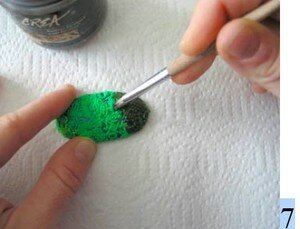
Fig 7: Apply a thin layer of paint on a small area.

Fig 8: I said a small area because acrylic paints dry fast and you want to control the process as much as possible. You cover a small area at a time and wipe off the surplus as quickly as possible. Your towel can be humid but barely. Just a little or else you will rub all the paint off. The paint should remain in the nooks and crannies!!

Fig 9: the result…. but we are not done yet!

Fig 10: Take the small oval and sand it with rough sandpaper. Do this under water to avoid breathing in the particles that aren’t all that good for your lungs. For illustration purposes, I didn’t do it under water: do what I say, don’t do what I do!

IFig 11: Why this sanding now? It is to even out, enlarge and roughen the surface to be glued.

Fig 12: Run another sheet of clay through the pasta machine (#3); I used a blue sheet to match the base sheet of my pendant. Give it a texture if you wish. This will be the back of your pendant. Always remember the backs of your pieces should be interesting and well finished. Roll another sheet of clay (it can be scrap clay or whatever) through the pasta machine at #3 or at the thickness of the cord you want to use.
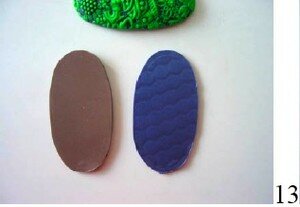
Fig 13: Cut out two oval shapes using your baked textured oval as a template.
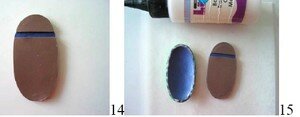
Fig 14: Place the textured side of the blue unbaked oval shape towards your work surface and place the other oval sheet on top of the blue sheet. Cut out a strip for your cord. Press together.
Fig 15: Apply liquid clay to the sanded surface of your textured and baked oval (the green one).

Fig 16 : Place the baked oval onto the two other sheets and make the joint as tight as possible. Bake once again for 30 minutes at the prescribed temperature.

Fig 17: Sand the sides to make them even.
Then, cut out a thin strip of clay (#6) and place that strip around the pendant to hide the different layers. Make all joints even with a knitting needle or whatever you use. Find and pierce the holes and rebake once again.
And coui coui coui my story is finie!!!! Take it from there….
Copyright Violette Laporte 2005

This tutorial with images is an intellectual property of its author.
Please, respect his/her work and do not copy / reproduce / translate it without his/her authorization.

